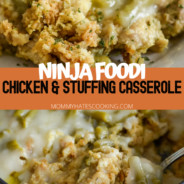
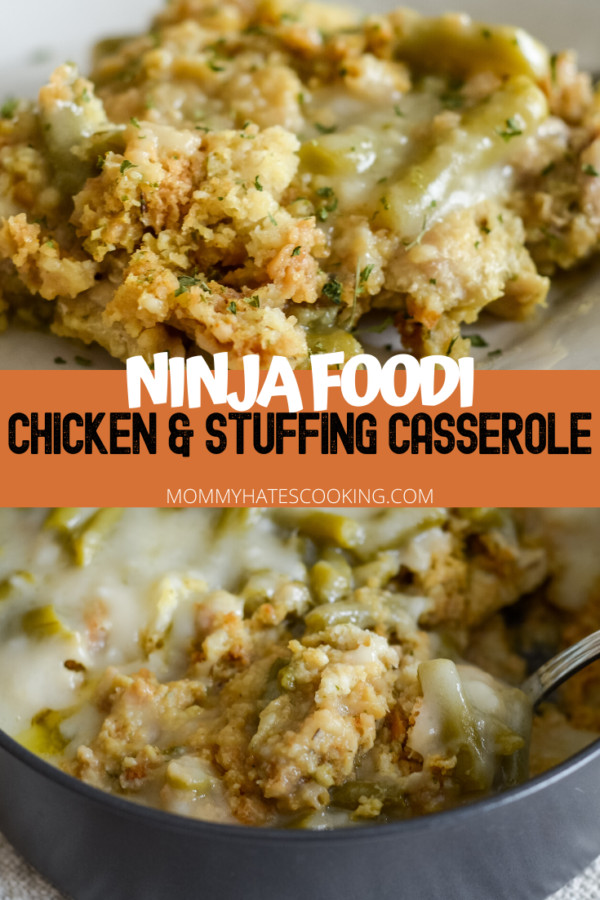
Make Ninja Foodi Chicken and Stuffing for an easy, comfort meal or make it in your Pressure Cooker or Instant Pot. The best part is that it’s easy to make gluten-free too!
This recipe is one of our favorites in the slow cooker, so I couldn’t wait to try an adapted version for the pressure cooker. It turned out perfect using our Ninja Foodi and the pressure cooker function, even better I made it gluten-free too.
How do you make Ninja Foodi Chicken and Stuffing?
Ninja Foodi Chicken and Stuffing takes the best of holiday dinners and puts them in one dish in the pressure cooker.
If you do not like your food to touch, just move on to this Air Fryer Turkey Breast because this is not for you.
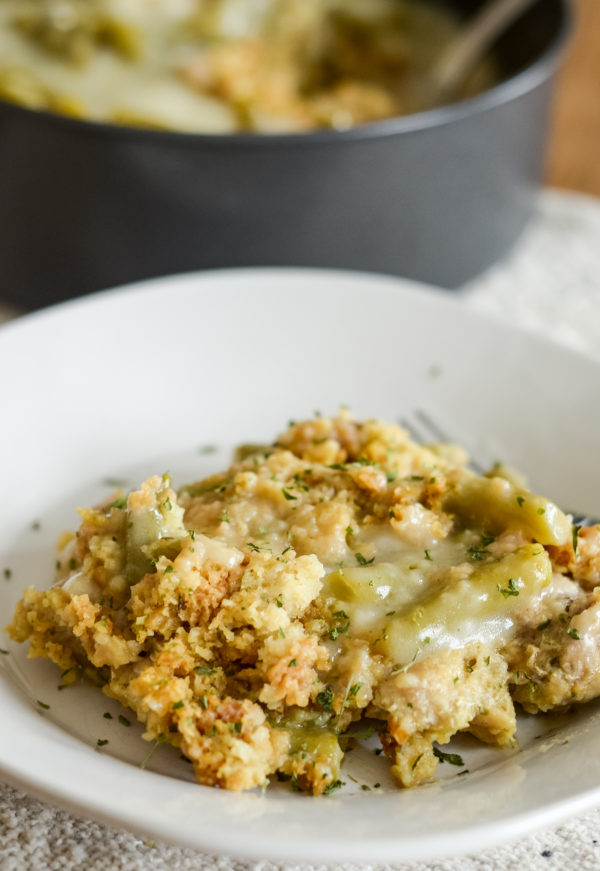
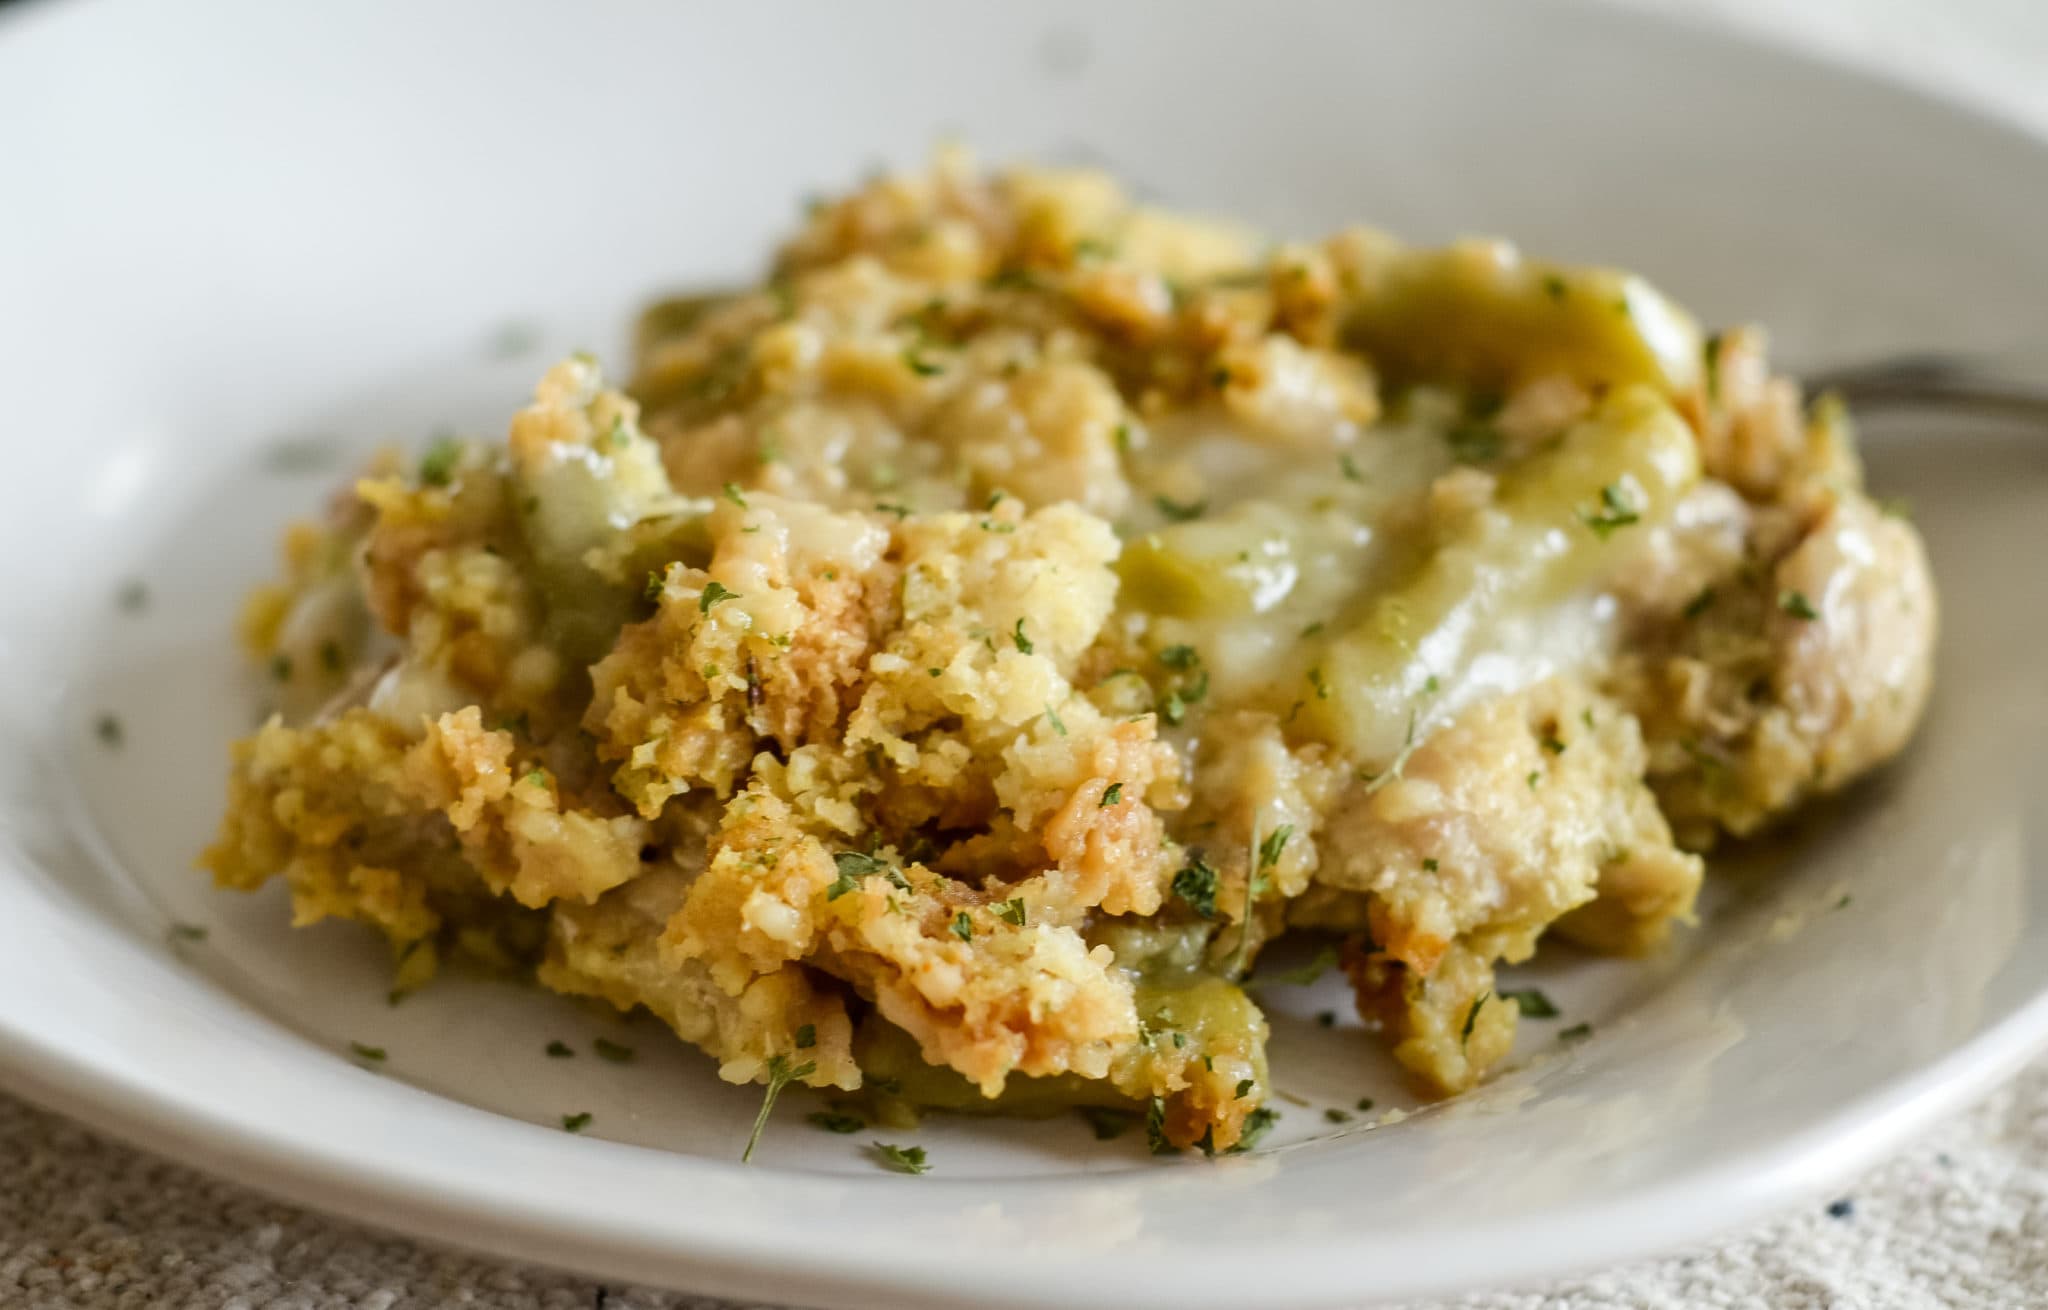
Ninja Foodi Chicken and Stuffing is all about mixing the food together, taking all those great comfort foods and making it into a one-dish dinner.

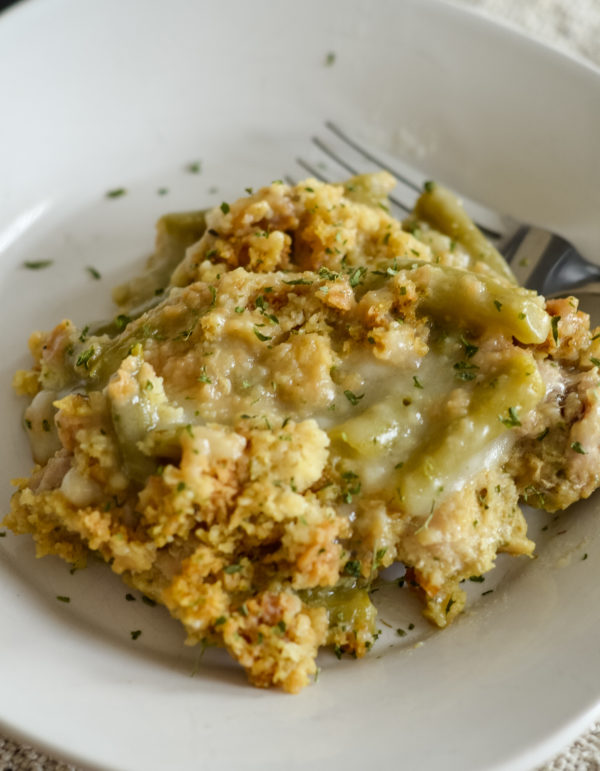
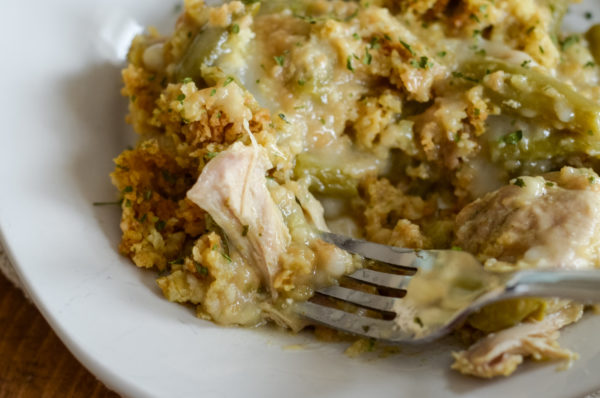
Once the Ninja Foodi Chicken and Stuffing is done, you have a big plate of comfort food to enjoy for dinner.
Should you use chicken breast or chicken thighs for Ninja Foodi Chicken and Stuffing?
I would use chicken thighs for this meal, skinless and boneless. Chicken breast has a tendency to dry out rather quickly, although you can use it for this, the best flavor will come from chicken thighs.
Chicken thighs have a juicer flavor and texture, they just shred apart after slow cooking with the other ingredients, making them a great choice for this meal.
What casserole dish should you use for this recipe?
This Ninja Foodi Multi-Purpose Pan is the PERFECT choice for this recipe along with many others as well. This is my go-to pan for the Ninja Foodi.
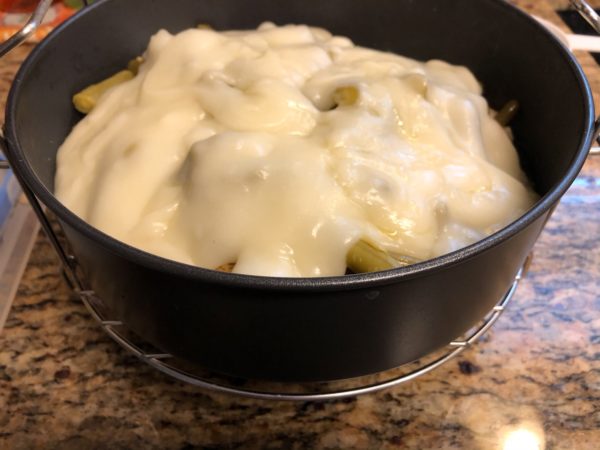
When you are making this dish, you will want to put the pan on top of the wire rack and be sure the wire rack is in the lowest position.
How do you make Gluten-Free Ninja Foodi Chicken and Stuffing?
There are two ingredients that will need to be adapted to make this gluten-free. The first one is stuffing. It’s important to use a gluten-free stuffing. We prefer this gluten-free stuffing from Aldi.
During the holiday season, I usually stock up on several boxes of gluten-free stuffing from Aldi to keep throughout the year for meals such as this.
It can also be made with any of your favorite boxed gluten-free stuffings.
The next swap needs to be the gravy. This 5 Minute Gluten-Free Gravy is the BEST one that I have found and it’s so easy to make, I suggest it even if you do not need gluten-free.
It’s much better than the canned or jarred versions.
If you use this gravy recipe, you will use the entire amount of gravy you make to pour over the ingredients in the dish.
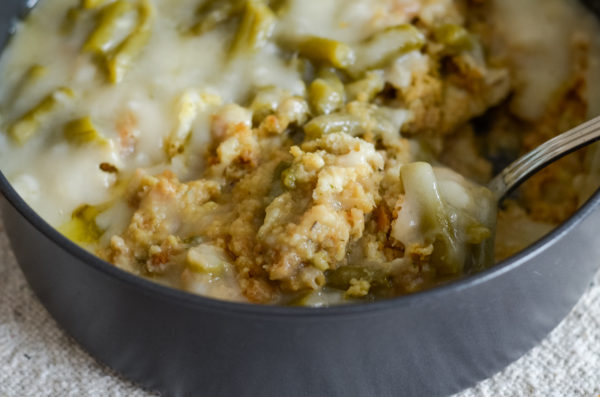
How does the recipe look when it comes out of the Ninja Foodi?
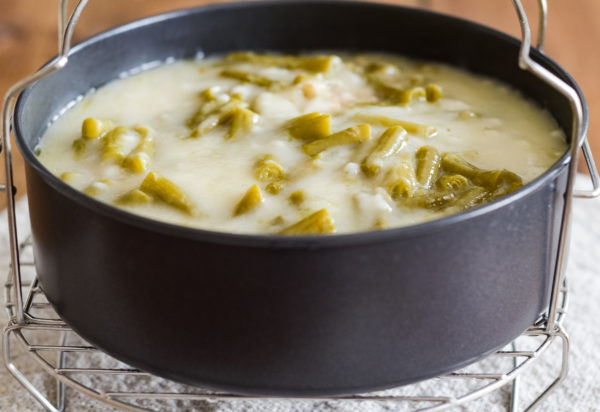
When it comes out of the Ninja Foodi, it’s going to look just like it did when it went in. The first thing you want to do is be sure the chicken is 165 degrees with a quick read thermometer.
Once you verify that it is cooked enough, which it should be, mix up the ingredients. This means stirring up the food in the dish so that everything is well mixed together.
Now that you have all the tools to make this recipe, it’s time to enjoy this delicious Ninja Foodi Chicken and Stuffing tonight!
Ninja Foodi Chicken and Stuffing
Ingredients
- 4 Boneless Skinless Chicken Breast or Chicken Thighs Thawed
- 1 Package of Chicken Stuffing or Gluten-Free Stuffing Similar to Stove Top
- 2 1/2 Cups Water Divided
- 14.5 oz Can Green Beans Drained
- 14.5 oz Can Chicken Gravy or Gluten-Free Gravy
Instructions
- In the Ninja Foodi, put the pot in the Ninja Foodi and add 1 Cup of water to the bottom of the pot.
- Using a casserole dish that fits the Ninja Foodi, spray it with a coat of olive oil spray.
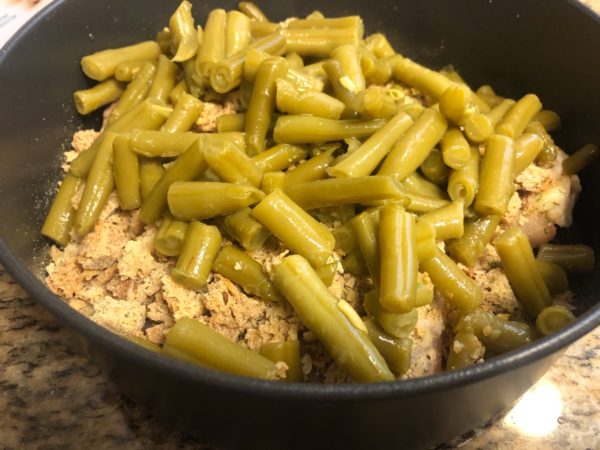
- Place the chicken on the bottom of the dish.
- Top with the stuffing and add the remaining 1 1/2 cups water over the stuffing.
- Top with the green beans and then finally with the gravy.
- Place the dish on the rack for the Ninja Foodi in the low position, see the post for the picture of this.
- Place it inside the Foodi and add the pressure cooker lid, secure it in place.
- Set the nozzle to 'seal'.
- Cook this on high pressure for 12 minutes.
- Quick-release (turn the nozzle to vent) to release the steam.
- Remove the lid, let cool for 5 minutes. Be sure that the chicken is an internal temperature of at least 165*F.
- Mix together the ingredients lightly with a spoon and serve.
Nutrition
did you make this recipe?
Make sure to tag #mommyhatescoooking on Instagram and follow for more @momhatescooking
Comments & Reviews
Loving GF says
Kristy,
I am so glad I found your website! I made your Ninja Foodi Chicken and Stuffing. My family really liked the recipe. I made a video on my channel, Lovintheglutenfreelife. Thank you for a good meal that’s gluten free.
Lovintheglutenfreelife
Amber says
Could the vegetable be switched to corn or carrots?
Mommy Hates Cooking says
That could work fine, I haven’t tried it though.
Harry says
I have a 5qt ninja foodie and I cannot use casserole dish that will fit? Please help thanks in advance Harry
Harry Jones says
I have the small ninja foodie I don’t have a pan to use in the ninja can I put it all in the bottom of my pot ? Thanks Harry
Mommy Hates Cooking says
Yes it should work at the bottom of the pot.