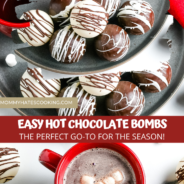
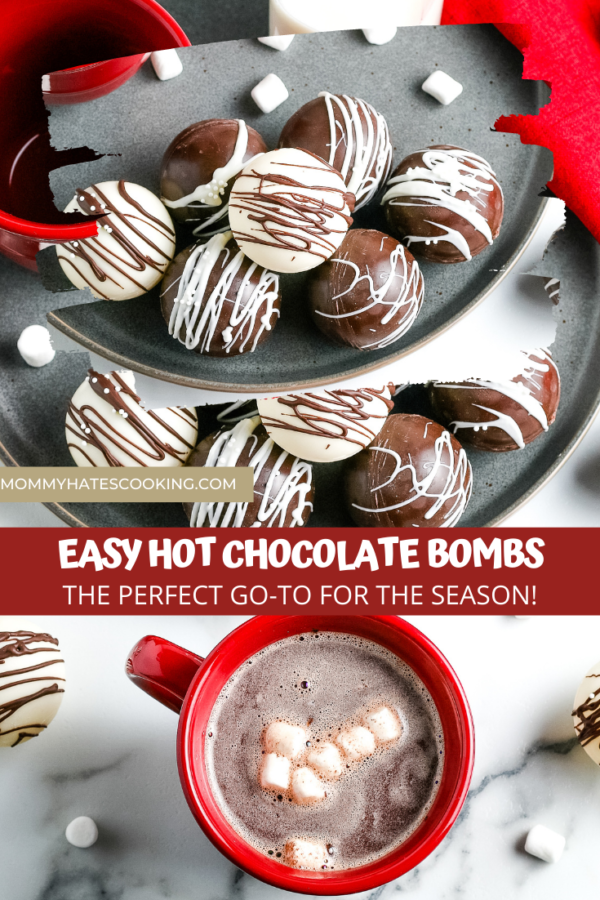
Make the BEST Hot Chocolate Bombs with this Hot Chocolate Bombs Recipe, these are easy to customize and naturally gluten-free too!
The latest trend to break the internet lately is these Hot Chocolate Bombs. My daughter has been asking for them for weeks, so it’s only fitting to get a batch made right in time for her birthday.

If you’ve been following the new recipes recently you’ll notice that I’m all about the hot chocolate right now. Be sure to check out this Whipped Hot Chocolate and this Hot Chocolate Mix as well. The mix will be used in these Hot Chocolate Bombs too!
Tips for Making Hot Chocolate Bombs:
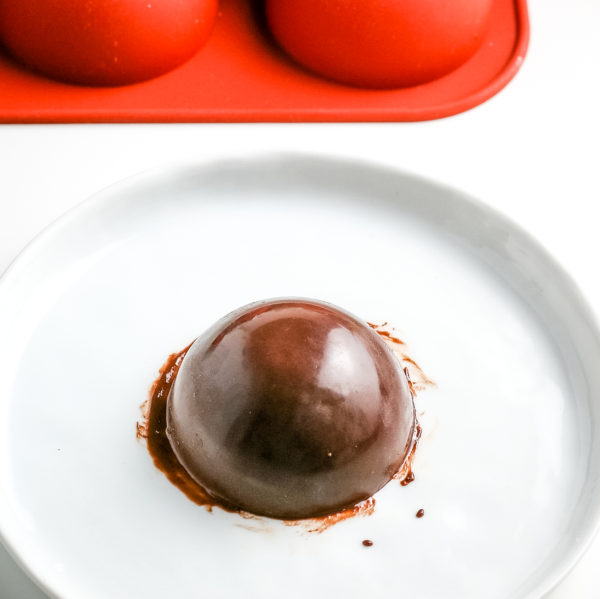
Remember to have some patience and go slowly when making these. The biggest tip I can tell you is that you have to use lots of layers to get the bombs thick with chocolate. I didn’t do this the first time and they turned into a cracked mess, once I learned this concept…they were easy to make.
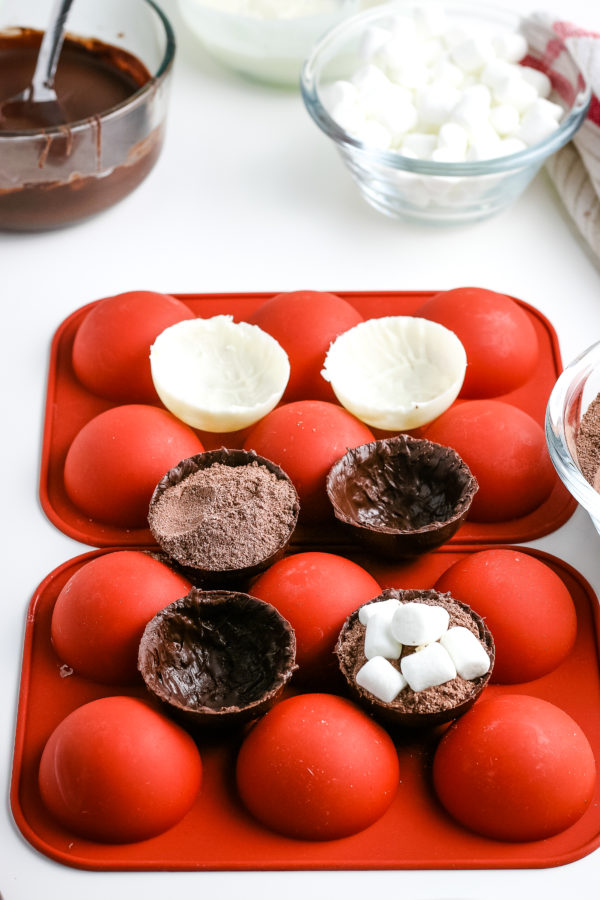
A mold works well for these, we used this mold from Amazon. I’ve also seen them made in Christmas molds too for the holidays, which are also very cute too.
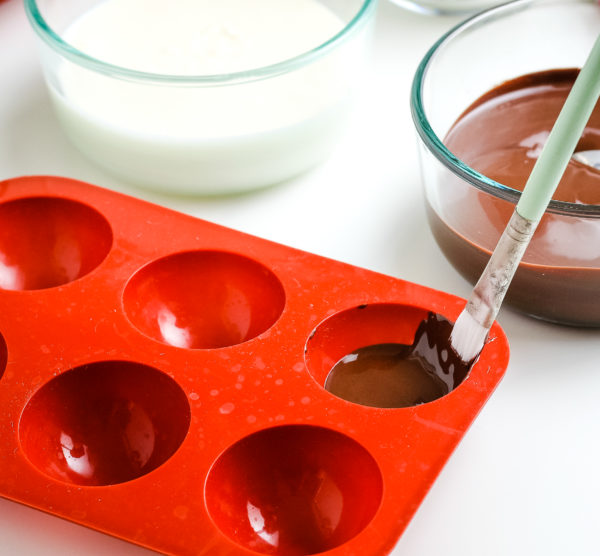
I’ve found that chocolate and vanilla bark, chocolate chips, or candy melts all work well for this recipe. The chocolate does need to be melted, so be sure to read the package instructions on melting the brand or variety you purchase.
Typically, it will be melted in a microwave-safe dish for 30 seconds, stirred, and melted again.
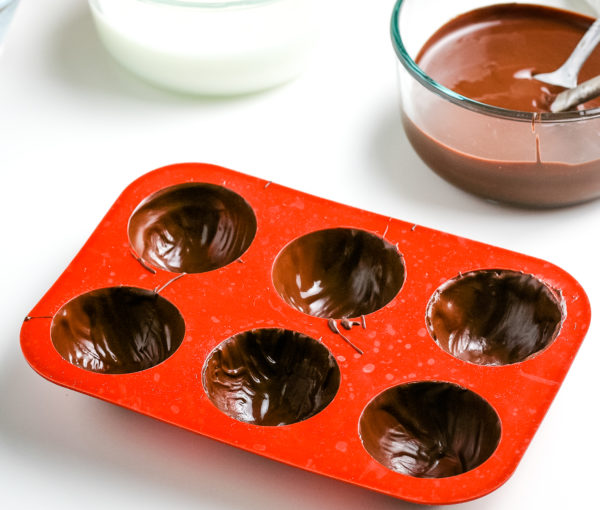
After each layer of chocolate, place the molds in the freezer for about 3 minutes or so at a time to harden, then add another layer. A paintbrush is a great option to fully coat the mold without using your fingers.
Another tip to remember is that you do not use a whole packet of the hot chocolate mix inside each mold, just about 2 tsp will do the trick.
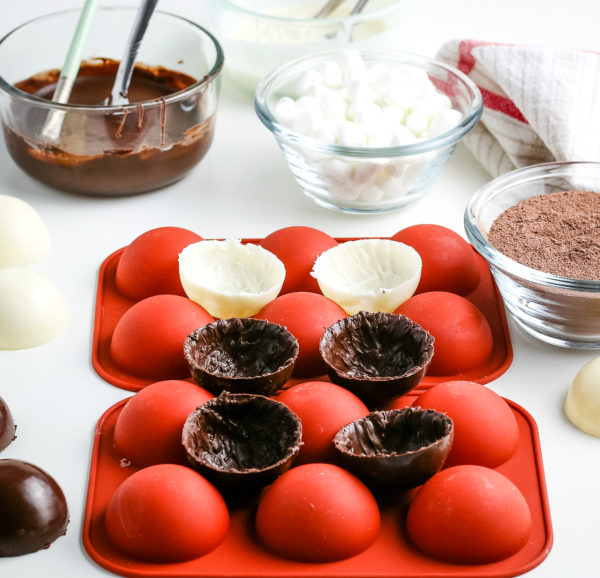
If you use the back side of the mold, you can keep them upright so that you can fill them as you see here.
How do you serve Hot Chocolate Bombs?
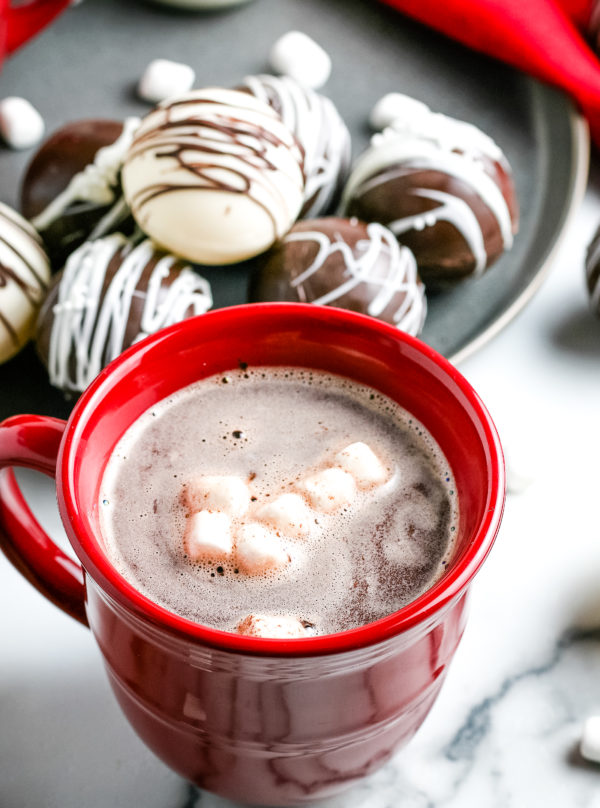
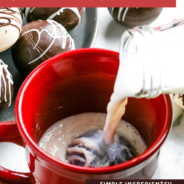
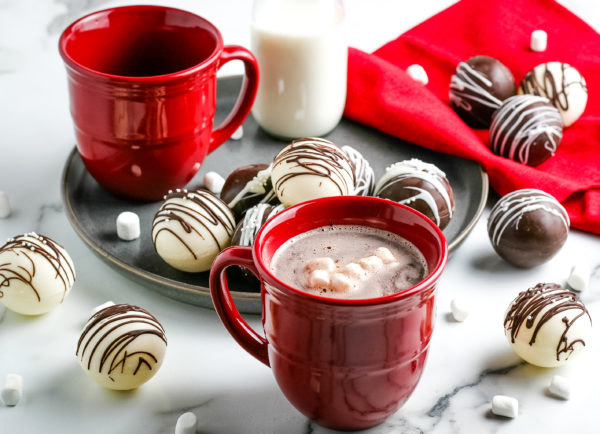
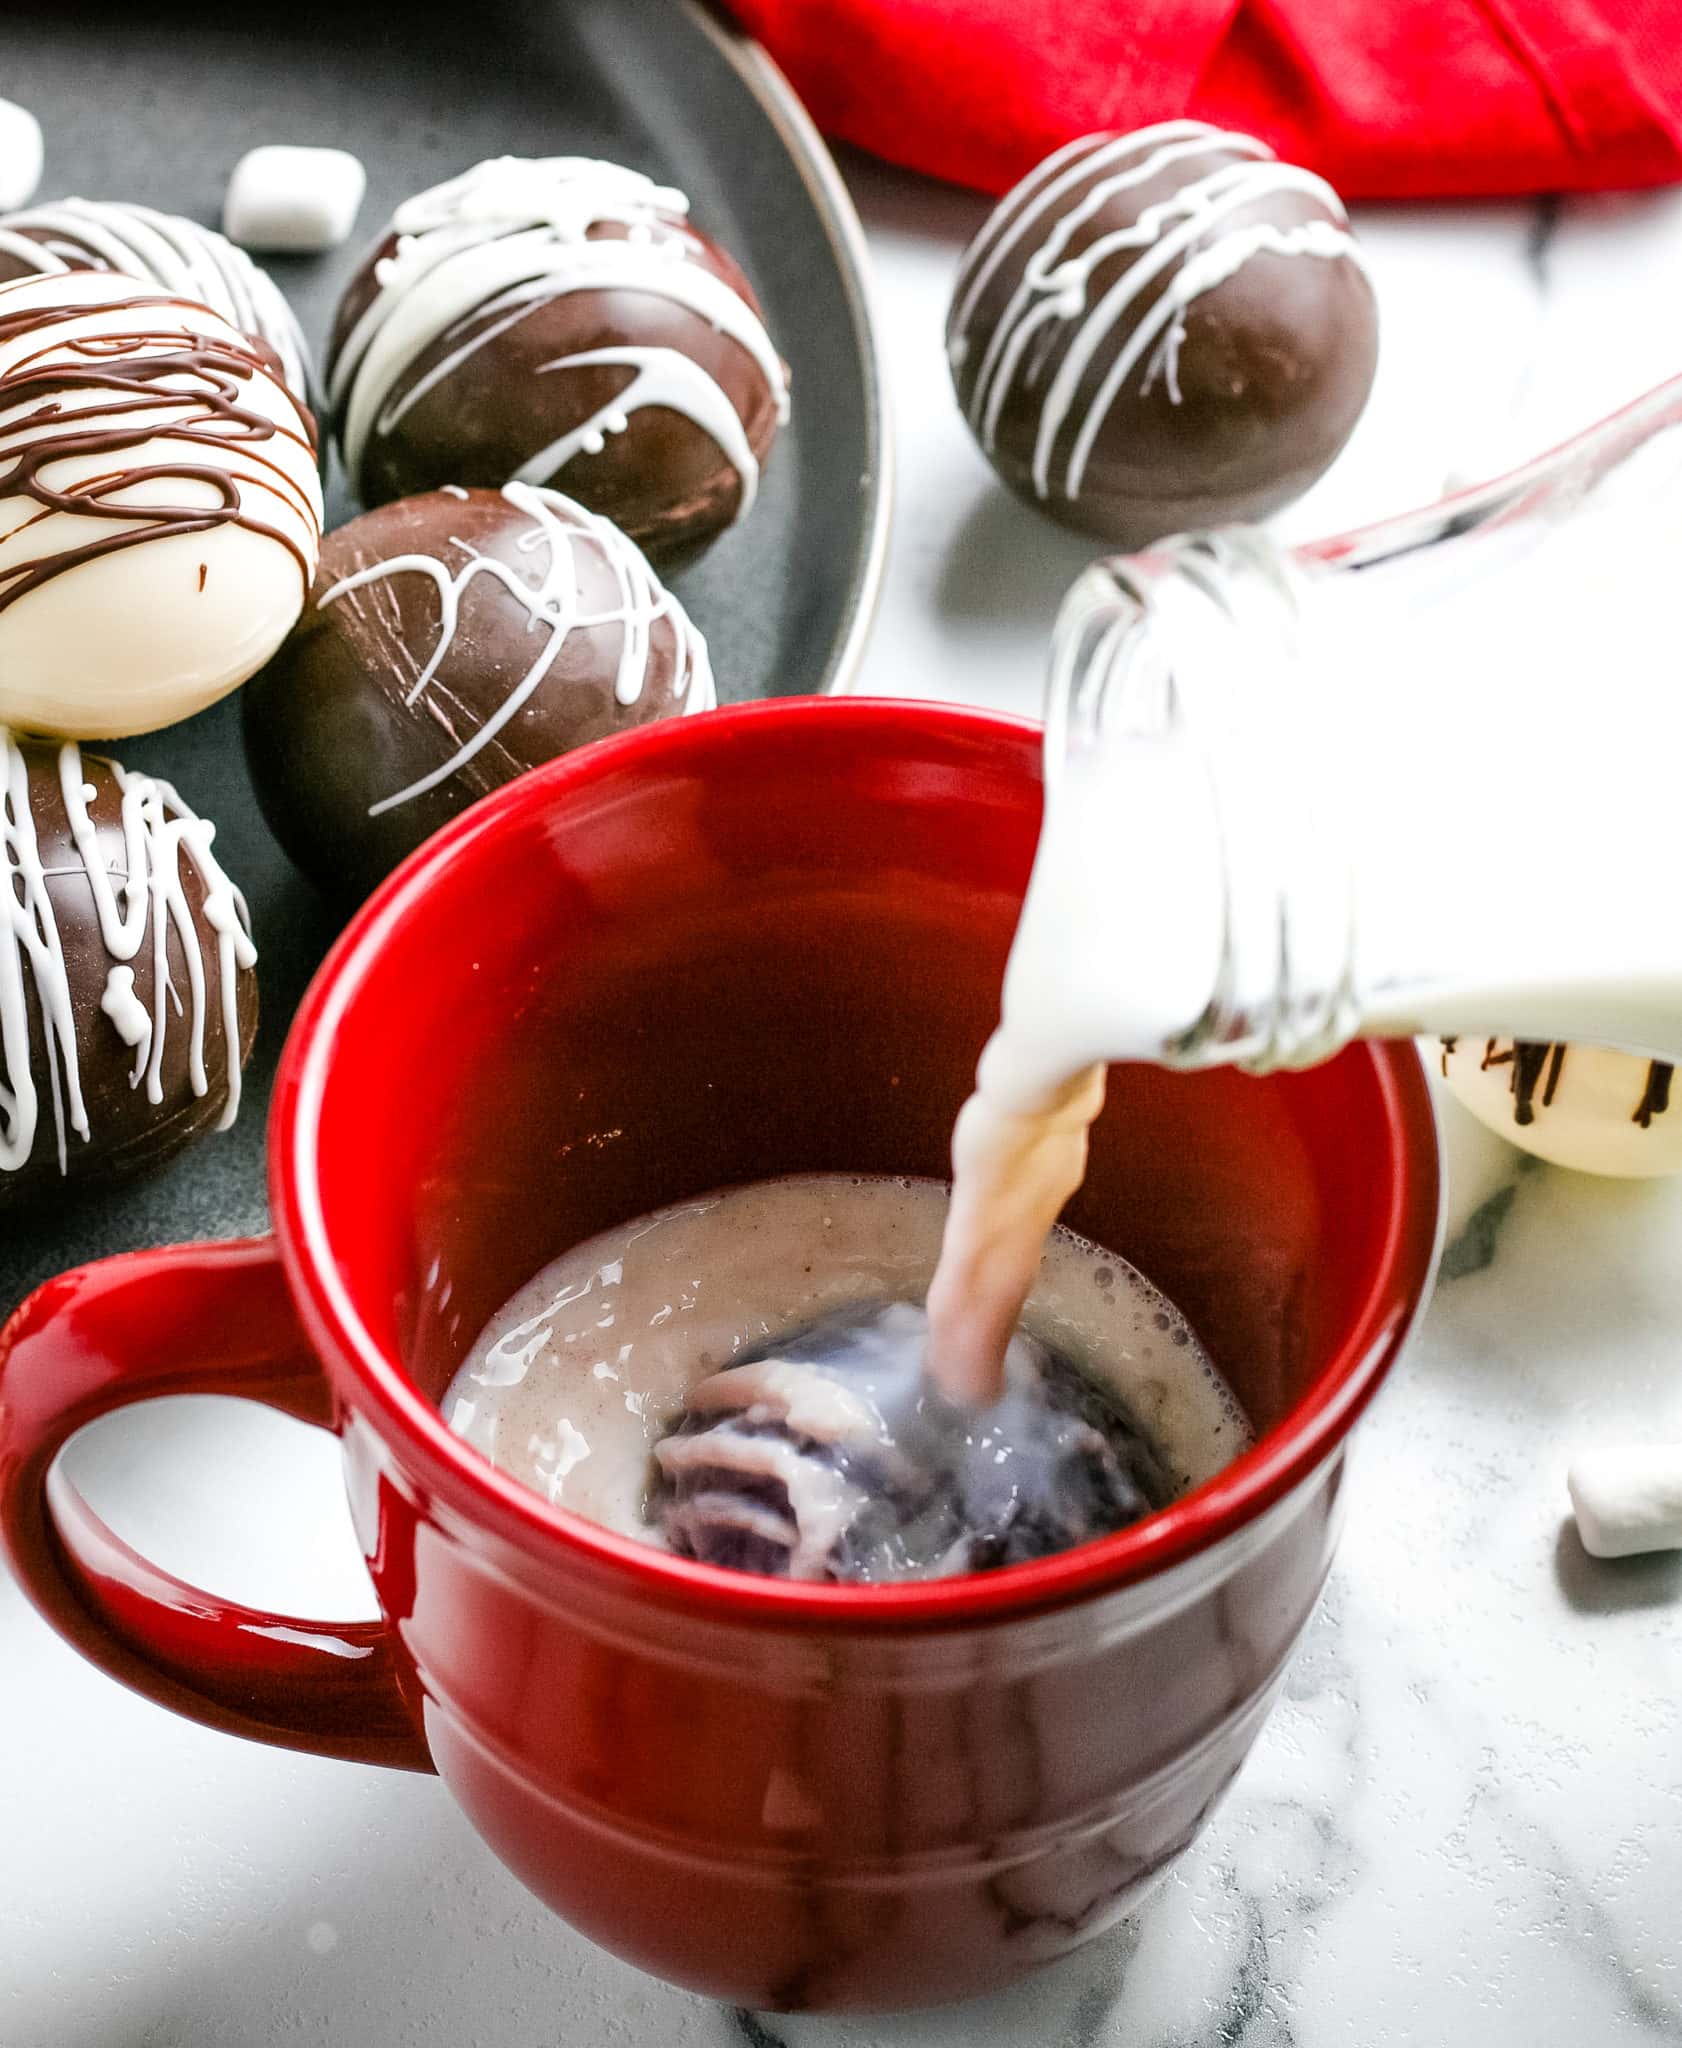
Warm-up milk, it needs to be quite hot, so be very careful and pour right over the hot chocolate bomb, or you can place a hot chocolate bomb in warm milk.
Once this is done, it melts and all the fun inside comes out.
Variations of Hot Chocolate Bombs:
My personal favorite is white chocolate bombs, then I like to add a drizzle of chocolate on top with crushed candy canes, you can get creative and do a variety of different variations of these.
Another fun idea is to add festive sprinkles on top too. Just get creative! These can be bagged up and given as gifts too.
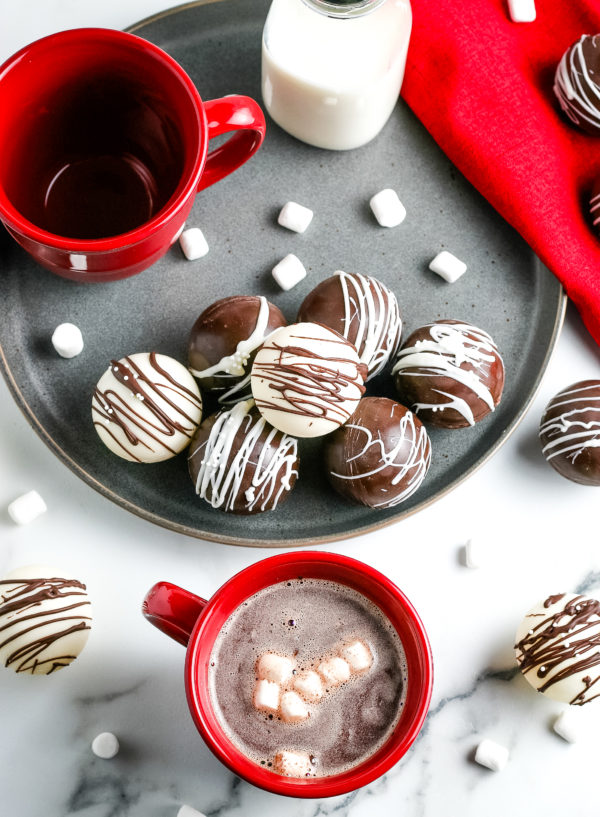
It is best to keep them in the fridge or freezer to stay cold until serving.
Enjoy!
Hot Chocolate Bombs
Ingredients
- Milk Chocolate White Chocolate or Dark Chocolate
- Mini Marshmallows
- 6 Tsp Hot Cocoa Mix
- Dome Silicone Molds
- Paintbrush
- Additional Toppings Nuts, Peppermint, Sprinkles
Instructions
- Melt the chocolate in accordance with the instructions on the package, or in 30-second increments in a microwave-safe dish.
- Using the paintbrush spread the chocolate evenly around the mold, make sure to get all the way to the edges.
- All the chocolate to harden and repeat layering more and more until you have done 3-4 layers.
- This can be hardened in the freezer for 2 minutes at a time.
- Be sure the chocolate is fully hardened before removing it from the mold.
- Fill one side of the shell with 2 tsp of hot chocolate mix and mini marshmallows.
- Heat a microwave-safe plate and place the second half of the chocolate shell open side down onto the plate and melt the rim.
- Quickly place the two open ends together and smooth out any extra chocolate around the seam.
- If preferred, drizzle more melted chocolate on top of the bomb and sprinkle with sprinkles, candy canes, or nuts.
- To serve, place in a mug and pour warm milk over it and it will melt and reveal the chocolate within.
- Store in the fridge or freezer to keep them hardened.
Nutrition
did you make this recipe?
Make sure to tag #mommyhatescoooking on Instagram and follow for more @momhatescooking

Comments & Reviews
Donna Reidlan says
What a wonderful, delicious idea!
Leanna says
I know these are the big thing for this Christmas, but I chimped out and bought a dozen for $60. So much cheaper to makethem. Next year they are first on the list of must dos. Yum
Natasha Mairs says
These look amazing!! I have always wondered how these were made. May have to try it out
Lyndsey says
These are so cute! I have been wondering how to make these, I appreciate the recipe! I’d love to invite you to share on Tell It Me Tuesday, you can find this weeks here: https://perfectlyimperfect-lwl.com/tell-it-to-me-tuesday-24-11-28-23-link-party/
Esme Slabbert says
This does look pretty easy and is so much fun to make and enjoy
Thank you for sharing your links with us at #289 SSPS Linky. See you again next week.
Kerryanne says
Kristy, I say ‘yum yum’ to hot chocolate bombs!!
Thank you for sharing your recipe at Create, Bake, Grow & Gather party this week. I’m delighted to be featuring it at tonight’s party and pinning too.
Merry Christmas ~ Kerryanne